"Music produces a kind of pleasure which human nature can not do without." ~Confucius
Showing posts with label Letters. Show all posts

Tuesday, January 22, 2013

Learning About Instruments - Double Bass


The boys both have a current love of the Double Bass, or in their description, "the BIG double bass!!" Whether they only love it because it's huge, or because of its sonorous, low timbre, I don't know... but I will take it and run with it for now! :-)

For 'art time' today, we made a simple picture with the Double Bass. Here it is if you would find it helpful for an instrument your little one shows a fancy to. I planned to incorporate each boy drawn into the picture and also make a connection to the letter "d" for double bass.

Gather some materials:
Picture of instrument, crayons/markers, glue, and a cut-out picture of your child's face (from an extra photo or printed off your computer). We also had two thin black strips to glue on as the bow.

I do a google image search for coloring pages (i.e. bass violin coloring page) when I do these sorts of activities as they are easy to transfer to a Word doc and then format, and they often have nice, clear lines.


Print out your pictures and have children color them appropriate to instrument's color (if they'll cooperate and aren't feeling unusually creative... "No, I want a purple Double Bass!" etc...).

Bonus points for having a YouTube, etc. video of the instrument being performed in the background for reference. This one was an awesome tango for double bass.


After they colored, we made the educational connection to "D for double bass", since it makes "d" sounds when plucked (like, "Da dum, dum dum, dee, dee, dum, dum, etc...) So, they drew some "D"'s coming from the instrument.

Then, we glued on each boy's face, and they completed the body, with hands on the instrument, then, finally they glued the bow on.
 

Simple, hopefully meaningful - and the more exposure, the better!

Enjoy!

Friday, October 5, 2012

"P" for Piano

We're talking about letter "P" things this week around here (especially pumpkins, of course). So this little activity fit in perfectly and is oh-so-simple.


You'll need some construction paper, scissors, glue, and a print-off of some piano keys.
To do this print-off, do a google image search for free piano key clip art. Copy and paste that picture into a Word/Google document and adjust the size accordingly. Copy and paste it across each line. One full page should be plenty for one child. I used 1 1/2 pages for my two.

Cut the piano keys out into long and small strips.


Next, cut out a big letter P. You can cut it out for younger kiddos, or let your older, more scissor-savvy ones do it on their own. We chose "pink" for letter P too, although you won't see any pink anywhere else in our house...

From here, they could do it on their own, really. But, I was the photographer, so I stayed around.

Have child line the P with glue from glue stick and paste the piano keys around, using the smaller ones for the curve in the P.


Affix onto a backdrop if you'd like and hang proudly in your home!

....or just act silly when mommy asks you to hold it up....

A good idea also is to have some piano music playing while this project is being worked on. You can look on itunes or YouTube, Pandora, etc.
Some recommendations: Mozart Piano Sonatas, Chopin Waltzes, Beethoven Piano Concertos or Sonatas.

Have fun!

Tuesday, May 22, 2012

Good Vibration(s)


Today was a simple lesson in how sound is produced. Key word: Vibration.
Sometimes we take sound for granted... I mean, it's just... sound.
You bang a pot, it makes a sound.  You open your mouth to speak, there's sound. You touch a piano key, there's sound.
Vibration makes that sound possible... so I decided to plant some seeds for that concept today.

Super easy.
This is what we used:

A cork board
Push pins that have a plastic grip --->
rubber bands of different lengths (thin-ish ones, the thick ones are too strong for this humble activity)
Construction paper cut into long strips (2 per child).

And - NO part of this activity should be done without parental involvement and supervision! This is kind of obvious, but just in case...

OK, so gather kids and bring them to the materials.

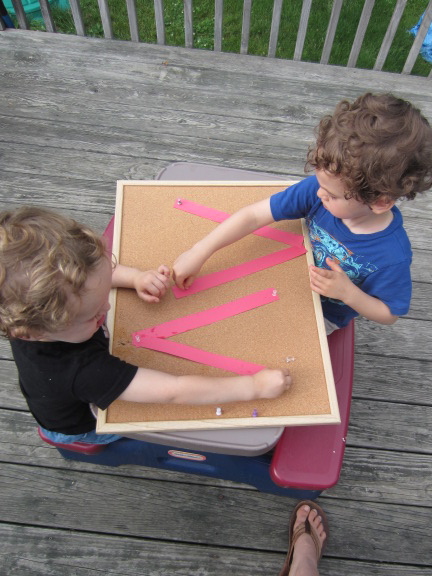
I told mine to put the two strips into the shape of a letter "V"

Once, they figured that out, I helped get them to put 4 push pins in their letter: one at the bottom, one at each of the top ends, and one about 2/3 the way up one side. Be very involved in this - or just do it yourself. Make sure the pins are in as far as they can go.


Yes, that is my foot. So professional, I know.

Next, loop the rubber bands from one tack to the next, along the shape of the V. You should have three rubberbands on the V when you're done - one very long, one medium long, and one shortest of all.


Once you're all set up, talk about your key word for the day, "VIBRATION!" Hence our V for Vibration.
**Gently** pluck the rubber bands on each group, listening to the sound each makes and watching the rubber vibrate back and forth. Pick out the low, medium and high sounds and talk about shorter "strings" producing higher sounds, etc..


We tried some rhythms and patterns... OK, I tried rhythms and patterns and they did their own brilliant improv...  :-) 
They had a lot of fun with this... but as is their nature, they started to get a bit carried away with the "plucking" so it was time to move on to phase two. 

If you happen to have a stringed instrument in your house, this little add-on can supplement what you were just doing... if not, no worries! Just mentally check out now. :-) 

Being music nerds, we have a few string instruments that demonstrate this vibration concept... guitar and violin. 

First, demonstrate how to make vibration on each instrument. Demonstrate where low-pitched and higher pitched strings are. 

Again - with MUCH SUPERVISION, invite kiddos to pluck or strum the instruments to produce a vibration, and hence - sound! 


You can see that the two-year-old has abandoned these lesser things and moved on to Mozart Piano Sonatas... way to go, buddy.

Enjoy!

Monday, May 7, 2012

Drum "D" - Learning about Timpani


Well, this morning I asked K if he was ready to start learning the violin soon. To which he replied a firm, "No." Sigh.... I'll try again later. But, you may know that he has always loved drums... whenever asked which instrument he'd like to play, that is his answer.
So, today I thought I'd combine some craft-time with music-time in a "Drum D" - only kicking it up a notch to make the drum a very sophisticated, orchestral instrument.... the kettledrum - aka timpani).

So, we gathered some materials.... 
Construction Paper (any colors, but if you want to be closest to the drum, use brown for the D and white for the drum head....
plastic straws
Felt (cut into small circles for mallet head)
Glue
Crayons/Markers

You can also use a book with pictures of the kettledrum to add to your instruction.

Here's the one I had on hand and we used this one today, keeping it open on the table as we talked about the drum: Meet The Orchestra by Ann Hayes.


Gather your kiddo/s and talk about the D for Drum concept, then have them figure out which way we need to turn the D for it to look like the kettledrum.... (I know you purists out there think I should have a K for kettledrum.... (which unfortunately wouldn't work very well) but you'll just have to work with me on this one!)


Have child glue the drum to their paper in the correct position.

If you used brown for the drum, great! If not, you can have them color it brown.

Next add 2 legs on the bottom for the drums' stand.
Then, have child draw him/herself playing the drum (I had to help 2 1/2 yr. old J with this, but he tried!).

Add a white stripe to the top for the drum head.

Next talk about Mallets (mallets are those sticks that you strike the kettledrum with, btw...).
Cut your plastic straws to make two small sticks, and cut circles out of your felt.
Glue straw-sticks onto each hand, then glue the felt circle at the end for the head of the mallet.


Voila! A wonderful example of kettledrums for your little budding musician!

 To take it ones step further, find some good videos of timpani playing on YouTube or another source. *Caution - Check out the YouTube videos on your own first, then put them to "full screen" on your computer to protect little eyes from the sometimes undesirable advertising images you probably don't want your tot seeing.

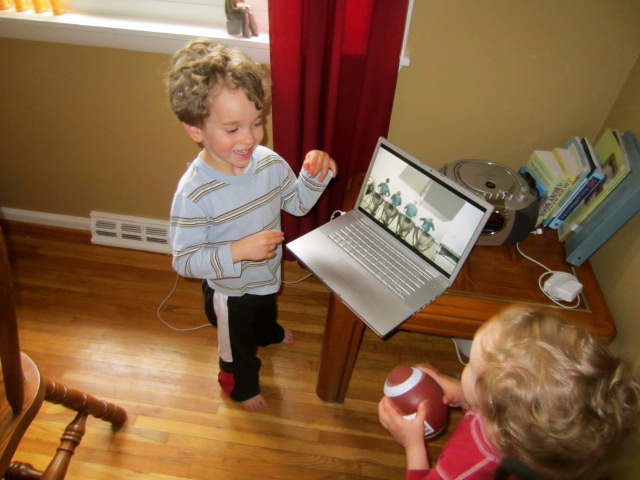
K loved this... here he is imitating the cross over sticking as observed by one performer:
Link of this video: Go here.
Here he is dancing around to the fast rhythms of another example:

(I just noticed that the laptop does not look very sturdy... Don't worry, honey... your laptop is just fine!)

This last one was a cool video of a piece called Timpanic MemBRAIN, (link:  Go Here) - it's 4 guys doing some fun percussion quartet playing.

Although I would love to see K learning Bach Minuets on violin, it was pretty cool to see him get so excited over kettledrums. :-)

Have fun!